| Page récuperer sur http://www.colorado.edu/its/docs/authenticate/win_ssh.html car le site est black-lister sur certain sites. |
|
||||||||||||||
|
Windows SSH Secure Shell Initial Connection and Transferring Files. |
|||||||||||||
| To use these instructions it is necessary to download and install SSH Secure Shell for Windows. If you haven't downloaded this application, do so now:
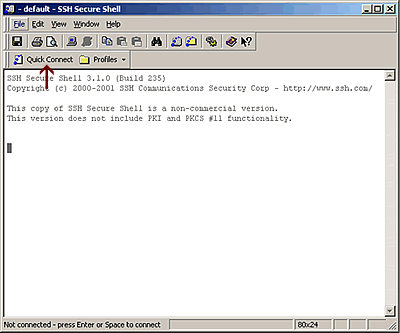
1. Once you have installed SSH Secure Shell for Windows, click on the SSH Secure Shell Client icon on your desktop. If you do not have an icon on your desktop, click on the Start button, go to the Programs menu and select SSH Scure Shell Client.
2. In the SSH Secure Shell Client window, click on Quick Connect.
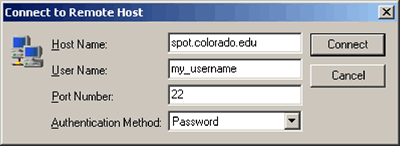
3. In the Connect to Remote Host window, first enter the host (a.k.a. server) you want to connect to in the Host Name text field. Then enter your CU login name in the User Name text field.
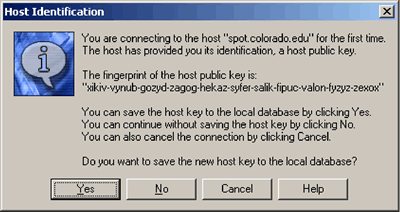
4. Click on Connect. 5. The first time you connect to a host a Host Identification window will appear. This key is used to help secure your connection to the server and should only appear once. It will ask Do you want to save the new host key to the local database? Click Yes.
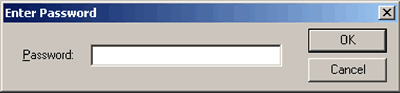
6. Next you will be prompted to enter your account password (in most cases, your e-mail password). Do so and click OK.
7. To save time in future sessions, create a profile. The Add Profile window will appear where you can enter a nickname for this connection. This profile will be listed in the profiles menu for future sessions. Enter your profile name and click Add the Current Connection to Pro...
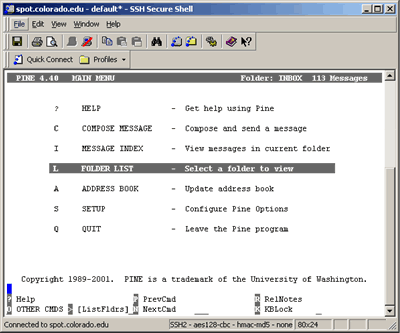
8. Congratulations, you are connected securely! Your Telnet session can begin. If you are using Pine, it should look similar to the window below.
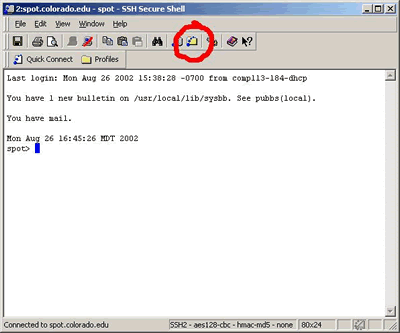
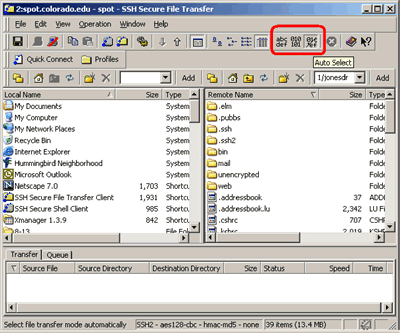
Transferring Files1. To transfer files using SSH Secure Shell, click on the Transfer icon that is shown in the window below.
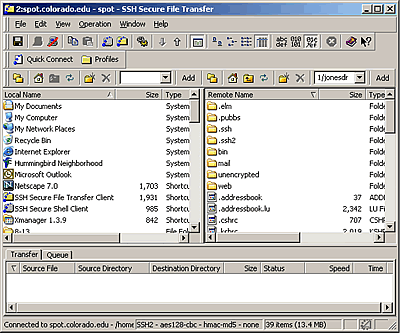
2. Two panes will appear in the SSH Secure File Transfer Window. The left-hand pane is your local machine and the right-hand pane is the host you have connected to.
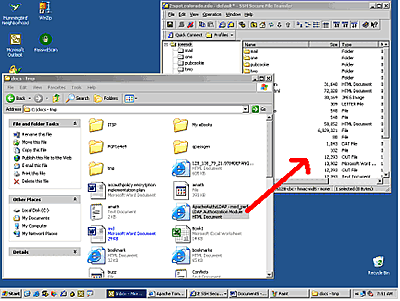
3. Transferring files is easy, just "drag and drop" files from the Windows Explorer right-hand pane of the SSH Secure File Transfer Window.
4. In most cases transferring files in Auto mode will work. Auto mode allows the client to automatically detect if the file is binary or not. If your file appears different after the transfer you may need to manually select ASCII or 01010 icons for text or binary files.
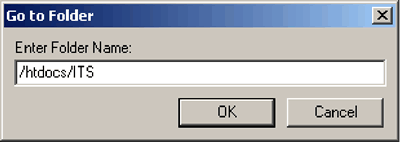
5. If you need to get to a directory that is not in your home path use Go to folder in the Operation menu. For example, /htdocs/ITS is shown below.
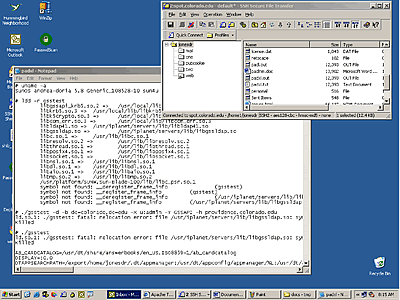
6. You can also directly open files from the SSH Secure File Transfer window just by double clicking on the file's icon. In this example, padxl.txt was double clicked and it was automatically opened in Notepad.
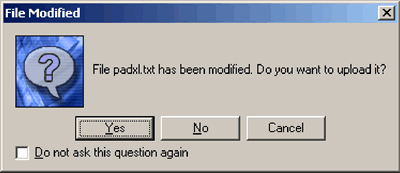
7. When you edit a file SSH will ask if you want to upload the changed file as shone below. Click Yes to upload the file.
8. Congratulations! Your files have been transferred from your local machine to the host you connected to. Get HelpTo get help contact the IT Service Center by phone at 303-735-HELP (5-4357 from an on-campus phone), by e-mail at help@colorado.edu, or in person at the IT Service Center walk-in (located just east of the UMC).
|
|
||||||||||||
| Support | | | Training | | | Facilities | | | About ITS | | | ITS Home | |||
|
|||||||||||